There’s nothing quite like the satisfaction of a freshly manicured lawn, and your trusty string trimmer is the secret weapon to getting those crisp, clean edges. But whether you call it a weed eater, a weed wacker, or string trimmer (yes, they are all the exact same tool!), there’s one minor headache every homeowner eventually faces: running out of trimmer line. While your machine likely arrived at your doorstep brand new and ready to roll, that plastic string doesn’t last forever. Fortunately, you don’t need to call in an expensive professional or throw your hands up in frustration. Restringing a weed eater takes less than five minutes, requires zero technical skills, and is incredibly easy once you know the steps. In this guide, we break down the ultimate dos and don’ts of stringing your trimmer and provide you with helpful YouTube videos, so you can get back to trimming your backyard.
Because design varies by model and manufacturer, the exact process for replacing your trimmer line might differ slightly depending on your specific machine. However, the foundational steps for restringing a single-line weed eater remain the same.
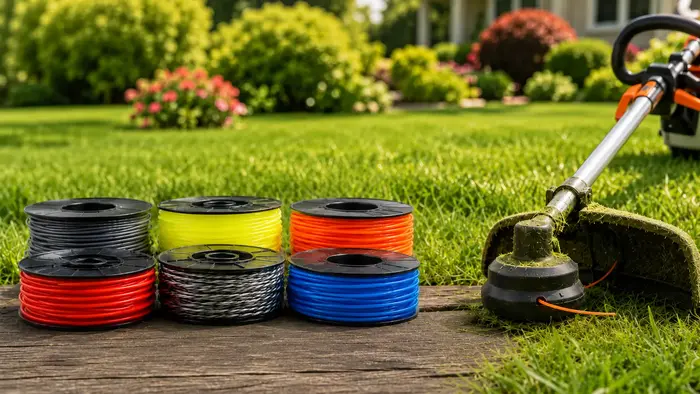
Before buying the best trimmer line, check your trimmer’s manual or the original box to find the correct line diameter.
Diameter: A popular, highly efficient choice for many string trimmer machines Trusted Source String trimmer - Wikipedia string trimmer machines is the Husqvarna Titanium Force Trimmer Line (0.095-inch) line, which balances durability with clean cutting power.
Length: Your manual will also dictate the ideal length, which typically ranges from 10 to 25 feet.
Pro-Tip: If you aren’t sure how much line your spool holds, cut a longer piece than you think you need. You can always trim the excess later. Once you find the perfect length, write it down so you don’t waste line next time!
Safety first: Ensure the weed eater’s engine is turned off, the battery is removed (if cordless), and the gearbox is completely cool to the touch before proceeding.
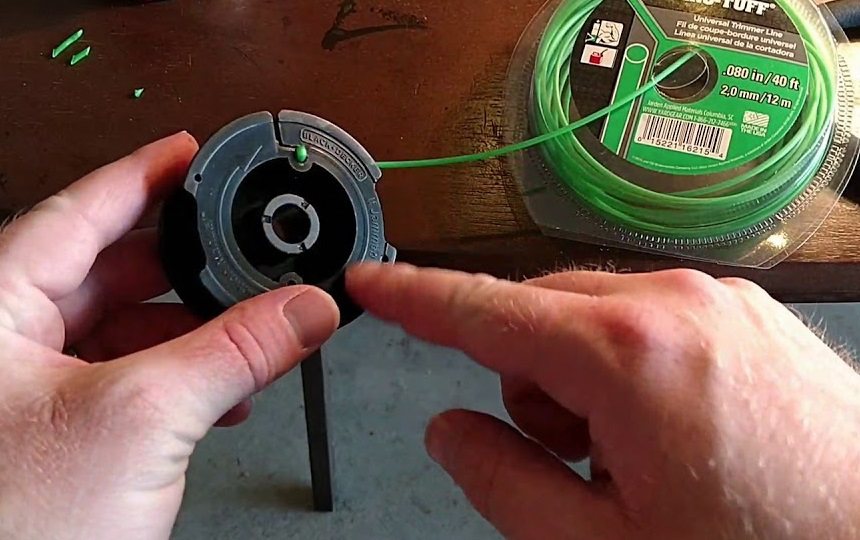
Locate the retaining cap on the bottom of the trimmer head. Depending on your model, you will need to either press the release tabs, unscrew the cap, or do a combination of both. Once the cap is off, lift the spool out of the trimmer head.
Find the starter hole: Look for a small anchor hole on the inside hub of the spool.
Anchor the line: Push about half an inch of the trimmer line firmly into this hole to secure it.
Wind neatly: Wrap the string tightly around the spool, following the direction of the arrows stamped on the plastic.
Ensure that you’re wrapping the string in neat, straight lines. This will help prevent line jamming down the road. Do this until the free string left is about 5” or 6”. Push the free string into the spool’s retainer to hold it in place.
Place the wound spool back into the trimmer head. Unclip the 5-to-6-inch tail of the line from the spool’s temporary retainer and feed it through the metal slot (eyelet) on the outer trimmer head. Snap or screw the retaining cap back into place.
If you dread the manual winding process altogether, consider upgrading to a tool that does the heavy lifting for you. For instance, the BLACK+DECKER LST136 is a highly-rated single-line weed eater that features an automatic feed spool.
If your trimmer head feeds two strings instead of one, don’t worry—the safety prep and basic mechanics are exactly the same as a single-line model. The only difference is how you anchor and wind the line.
Here is how to handle a dual-line spool:
Cut two equal lines: Cut two identical pieces of trimmer line (usually about 10 to 12 feet each) based on your manufacturer’s recommended diameter.
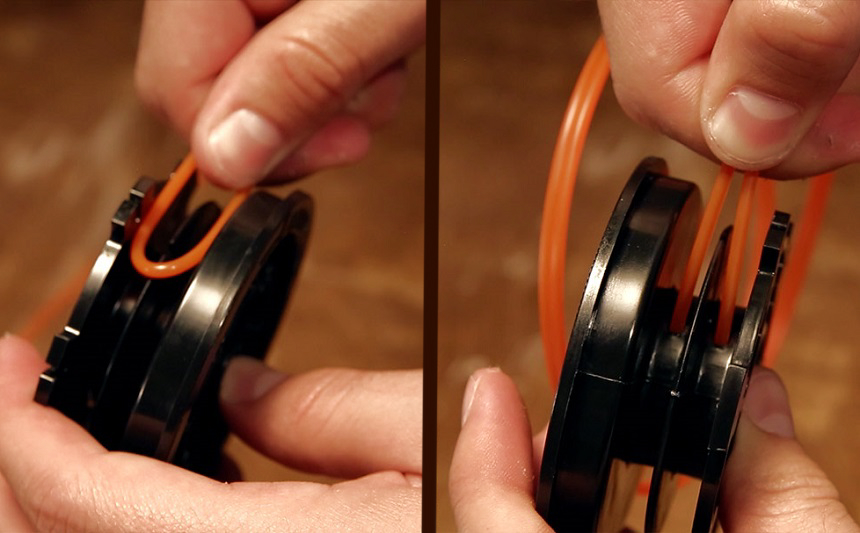
Find the two anchor holes: Once you pull the spool out, you will notice it has two separate channels divided by a plastic ridge, and each channel will have its own small anchor hole.
Wind the channels separately: Insert the first line into the top anchor hole and wind it tightly in the direction of the arrows, leaving about 6 inches of slack to snap into the top retaining notch. Repeat this exact process for the second line in the bottom channel.
Feed through both eyelets: Drop the spool back into the head, unclip the lines from their temporary notches, and feed one line through each of the two metal eyelets on the outer cap before snapping it shut.
The how-to for stringing such a Ryobi weed eater involves turning off the engine and cutting the line to size. As you might’ve noticed, these two steps are similar to the other two stringing methods as well. After that, locate the eyelets on the trimmer head and rotate the cap. The aim is to make sure the arrows align with these eyelets.
For confirmation, look through one eyelet and you should see through the eyelet on the opposite side of the trimmer head as well. Thread the prepared line through both these eyelets until the string left hanging is the same length on both sides.
After that, twist the head a few times as this will pull the string into the head. Most machines have an arrow telling you which direction to rotate the head. Do this until you have about 5” or 6” of string left on both sides, and you should be done.
In terms of stringing, the Ryobi 40V cordless string trimmer is one of the most preferred by users since the trimmer head has a mechanism to help reel in the line.
Stringing a Husqvarna string trimmer is usually quick once you know the process. First, turn off the trimmer and remove the spool cap from the trimmer head. Pull out the old line and clean away any dirt inside the spool. Cut the recommended length of replacement trimmer line, then insert the line into the spool holes or anchor points and wind it tightly in the direction shown by the arrows on the spool. Leave a few inches of line exposed on each side before reinstalling the spool and securing the cap. Many newer Husqvarna models also feature a convenient Rapid Replace or T25 bump-feed head, which makes reloading trimmer line much faster without fully disassembling the head.
Learning how to string a weed wacker properly can save you a surprising amount of time, frustration, and wasted trimmer line. While the process may look slightly different depending on the brand or trimmer head design, most weed eaters follow the same basic principles once you get the hang of it.
Whether you use a bump-feed, fixed-line, or reel-easy system, taking a few extra minutes to load the line correctly will help your trimmer perform better and reduce jams, tangles, and uneven feeding. If you trim regularly, it’s also worth keeping extra line on hand and replacing worn spools before they become a problem.
With the steps and tips in this guide, you should now be able to restring your weed eater quickly and get back to maintaining a clean, sharp-looking yard.